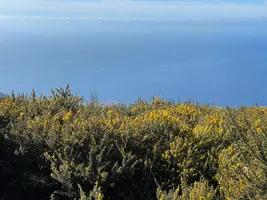
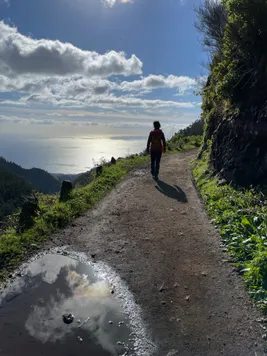
Levada das 25 Fontes is probably the most popular levada, if not the most popular hike in Madeira. Although we consider PR1 - Pico do Arieiro to Pico Ruivo the must do hike in Madeira, that hike is a difficult one that can’t be done by those without a very good physical condition. PR6 - Levada das 25 Fontes can be hiked by absolutely everyone, and it is truly spectacular.
Before we go any further, we strongly recommend you to read our article about things you should know about hiking in Madeira:
 Travelfoss
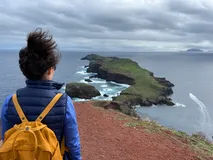
What you should know before you start PR6
We love exploring, and we walked on multiple trails around PR6. This allowed us to see the bigger picture, understand how all the trails are linked together, and which one is the best.
Car Parks
The largest and most known car park for PR6 Levada das 25 Fontes is the one on the ER105 road (ER110 on Google Maps). However, our exploration made us realize that this is not the best starting point for us, and probably for a lot of other people like us. This large parking lot is on the ridge of the hill, so we’ll call it the upper car park.
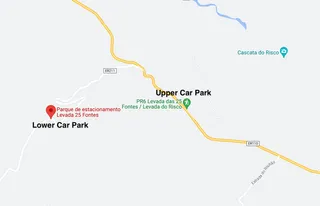
There is also a lower car park which is smaller, at a lower altitude, on the ER211 road (there is also a public bus stop). Here you are basically on the other side of the hill compared to the PR6 trail, and at about the same altitude as the Levada Das 25 Fontes.
Weather
On our trip to Madeira the weather hasn’t been nice to us. We wanted to hike the PR6 trail on a day without rain, and with as little fog as possible. We had several days in which we went to the upper car park for PR6 just to see how foggy, windy, rainy it was and gave up.
Being on top of the hill with no shelter from the elements, makes the weather conditions at the upper car park irrelevant compared to the PR6 trail itself because of the altitude difference.
To avoid the bad weather up there, you can use the lower car park. No matter how foggy it is on ER105, if the weather is fine on ER211, at the lower car park, then it is very likely that the weather on PR6 is fine too.
The Start of Rhe PR6 Trail
The PR6 trail itself does not start at the top parking lot, but some 1.8km down the hill, at Casa do Rabaçal. There are, however, some shuttle busses that you can take down 1.8km (1.1 miles) to the beginning of the PR6 trail. Since we are not big fans of shuttle busses for such small distances, we explored the area by foot and discovered a better alternative to start the PR6 - Levada das 25 Fontes trail.
In case you are curious, the walk from the top car park to Casa do Rabaçal is relatively boring, on asphalt, with shuttle cars passing by. We only went downhill, but I can only assume that uphill is only more boring.
PR6 Alternative Trail Start
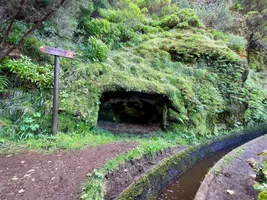
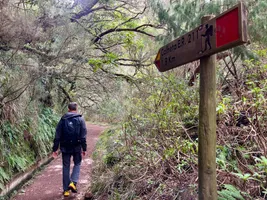
Our go to option is to start from the ER211 road lower car park through the Levada das 25 Fontes Tunnel or Tunel do Rabaçal. From the ER211 road you follow the “25 Fontes”, “PR6.6 - Casa do Rabaçal” or “PR6.7 - ER105” signs. At a point, these signs will split, and you can choose to follow either of them.
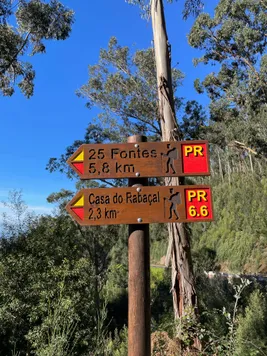
We personally started on PR6.7, and returned on PR6.6, just because we love exploring. If we were to do the trail again, we would choose to start and return on PR6.6.
PR6.6 - Casa do Rabaçal
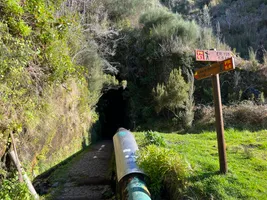
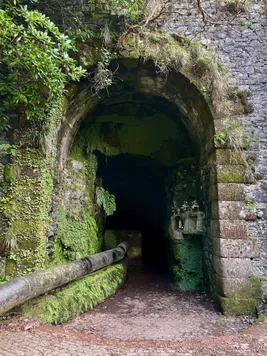
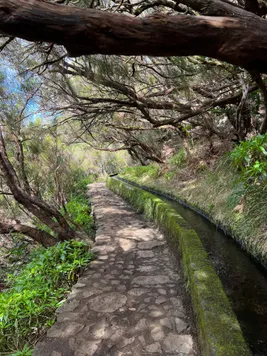
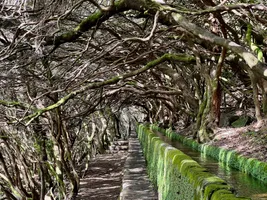
PR6.6 takes you from the parking on ER211 to Casa do Rabaçal where PR6 (Levada das 25 Fontes) starts. The PR6.6 trail has around 2.2km, and goes through a long tunnel of 0.8km (0.5miles). It’s going to get dark, so having a head lamp is highly recommended.
The tunnel is at the same level with the levada, so the trail is mostly flat. Shortly after exiting the tunnel, the trail intersects with the trail that comes down from Casa do Rabaçal to the leavada. From now on you are on PR6, the same trail as those that came down with the shuttle.
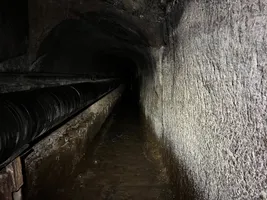
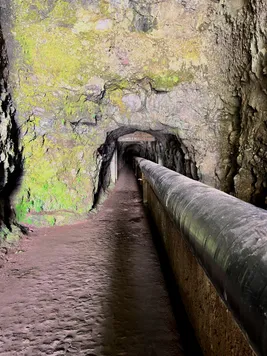

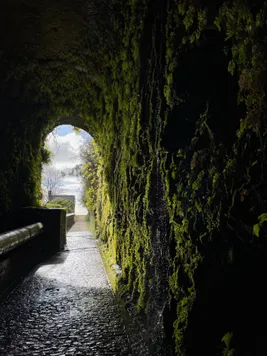
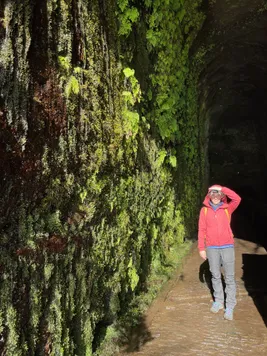
Note: The PR6.6 trail might not be for you. Use good judgement to asses if this trail is for you. The tunnel is 800 meters (0.5 miles) long, and it can become a psychological challenge to some people.
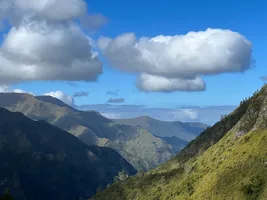
PR6.7 - ER105
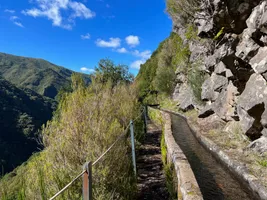
PR6.7 will avoid the tunnel and take you up the hill, reaching the large parking on ER105. It’s just like having parked there, and starting the hike from there. The only difference is that at the end you can choose to go through the tunnel on PR6.6, which is flat, instead of going up to the parking on ER105.
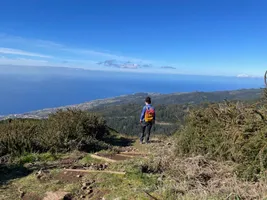

The ascent on PR6.7 is demanding and not worth the effort in our opinion. If you have a rented car, you can just drive at the large parking lot on ER105 on a sunny day, or even after visiting Levada das 25 Fontes. From there walk around to admire the landscapes on both sides of the hill, and that will make up for not hiking PR6.7.
About The Trail
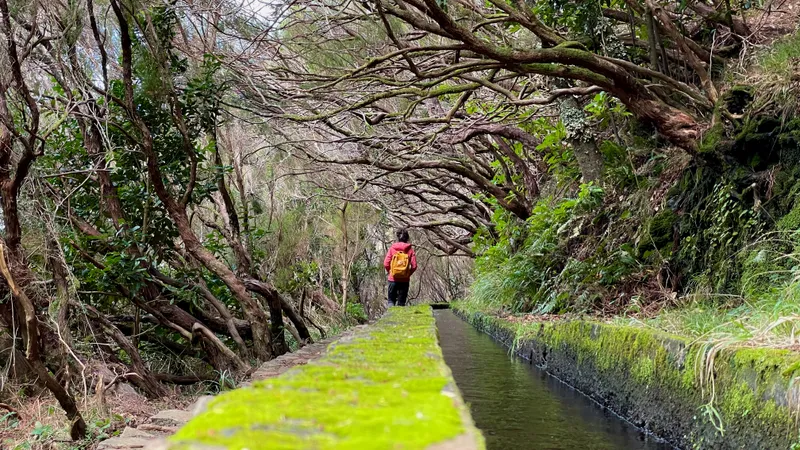
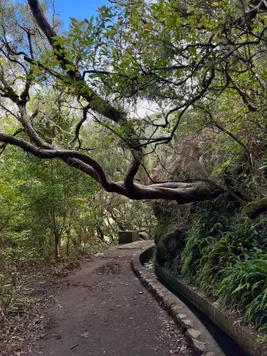
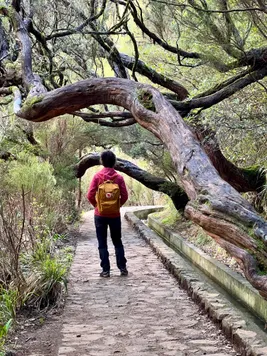
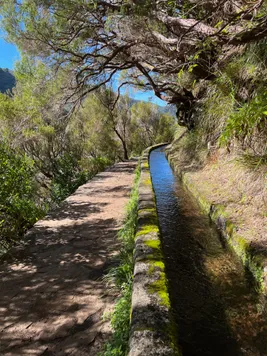
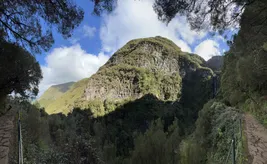
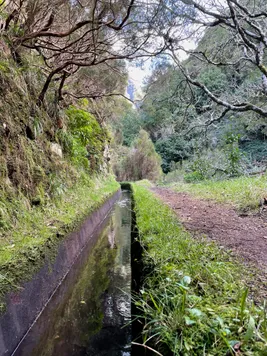
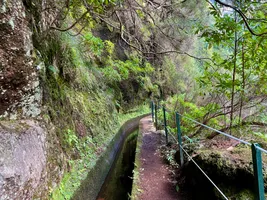
Levada das 25 Fontes is usually an easy trail. It is all paved, with less mud than other levadas. There are handrails when necessary, and the overall risk of vertigo is limited. I have some mild height vertigo, and I had absolutely no issues on the PR6 trail.
The PR6 trail is calming, and peaceful. It brings you closer to nature by surrounding you with lush green vegetation and the never-changing sound of moving water.
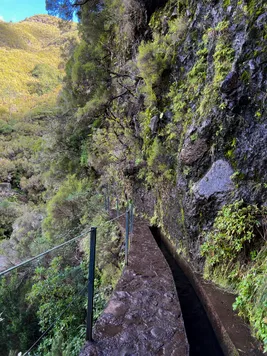


There is a section on the PR6 trail that is made one way because of the narrow path. the other way of the trail is made through the forest and there is a bit of ascent there, but nothing too hard. Please respect the signage on the trail and use the correct trail.
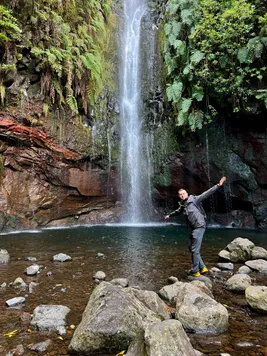
PR6.1 - Levada do Risco

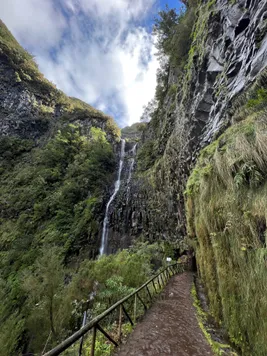
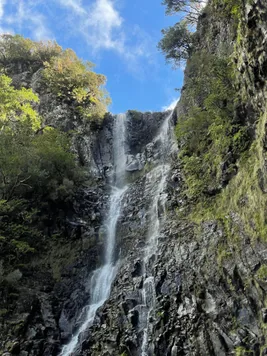
PR6.1 - Levada do Risco is just a short detour from the main PR6 trail, so there is no reason why not to check out Levada do Risco. The final Risco viewpoint is simply breath-taking and you won’t regret walking a few extra kilometer.
Elevation gain
Levada trails are usually flat, because the trails are along a levada, irrigation canals through which water slowly flowing downhill. If you choose to go PR6.6, then the elevation gain is minimum.
Distance
The total distance varies depending on where you start the hike. If you choose to start from the lower car park on the ER211 road, on PR6.6 through the Levada das 25 Fontes Tunnel, then there are 5.8km from start to the final destination (a beautiful lagoon). Coming back the same way, that makes 11.6km (7.2 miles) in total.
If you choose to go to Risco (PR6.1) as well, that will add around 1km each way, making a total of 13.6km (8.5 miles). It may sound long, but it is easy walking, and the views will make you forget for how long you have walked.

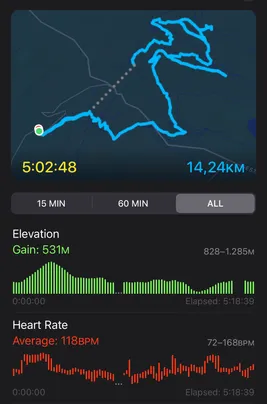

In my workout, the elevation gain is so high because we hiked PR6.7 at the beginning of the trail, and because we went down from Levada das 25 Fontes to Levada da Rocha Vermelha, and then back up. If you stick to PR6.6, PR6, and PR6.1, then your elevation gain will be under 50m.
Trail Detours and Alternatives
As you already know, we like exploring. We didn’t come back on the same levada trail, Levada das 25 Fontes. We went down a bit, on a different levada called Levada da Rocha Vermelha. Rocha vermelha translates into red rock, which is the color of the rock used for the levada.


On this levada, there is an even longer tunnel that exits relatively close to the car park on ER211. However, we didn’t have enough information about this tunnel (if the trail is closed or not), so we decided to close the detour with a loop and continue on the Levada das 25 Fontes, and through the PR6.6 tunnel.
The detour is not really worth the effort, unless you continue the trail through the Levada da Rocha Vermelha tunnel. After checking the AllTrails app, the tunnel seems to be open and people use it frequently.
The Hiking Gear You Need
As enthusiast hikers, there’s no better way to observe and admire nature than a hike. However, the thrill of a hike can be ruined if you don’t have the proper gear with you. For this we made a special article about the gear you need on every hike.
Travelfoss
And if you are going to Madeira in the winter season, then don’t forget to take with you some cold weather gear.
Travelfoss
We hope this information will make your hike more adventurous, beautiful, and enjoyable!
If you’re planning a trip to Madeira and you are looking for more ideas, hikes and awe-inspiring places and experiences, then check out our other articles about this destination:
Travelfoss
It takes a lot of planning for the perfect trip, but packing can sometimes be frustrating. Either packing too many things or packing too few can ruin a bit of the fun. We've perfected our travel packing checklist over the years, and we believe it will be of good use for you too. We also have some travel packing tips & tricks to share to save you the hustle we once had.
Related Travel Articles

Writing free, independent and personal travel content since 2021. If you appreciate what we do, then you can return the favor by using the affiliate links below.
- Get your accommodations on Booking.com
- Buy your gear and gadgets from Amazon
- Book flights using Expedia
- Book activities on Get Your Guide
- Book guided trips on G Adventures
Writing free, independent and personal travel content since 2021. If you appreciate what we do, then you can return the favor by using the affiliate links below with no cost for you.