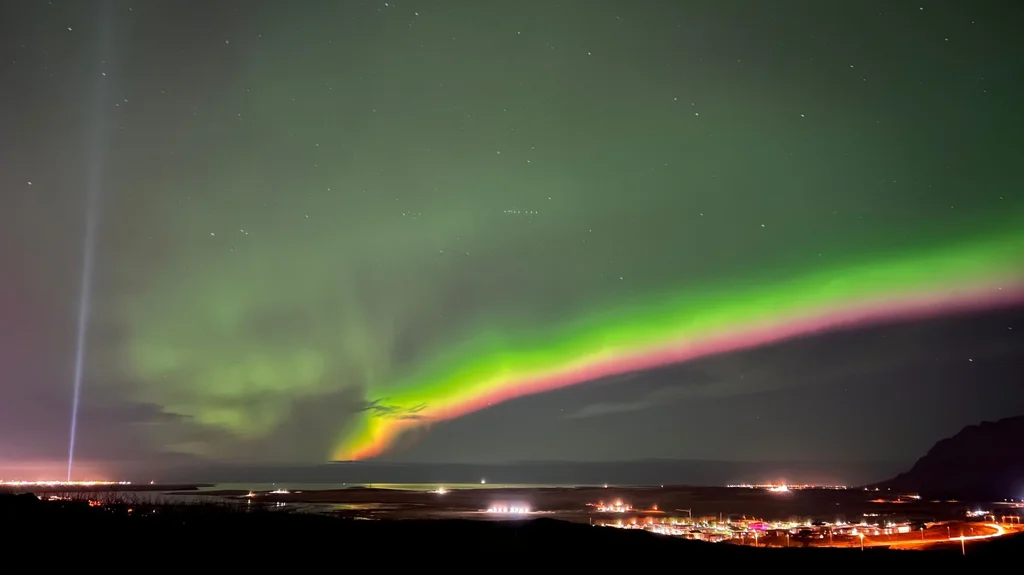
Days are getting shorter, and nights longer in the Northern hemisphere. You guessed what that means: the start of a new Northern Lights season. Anywhere close the Arctic Circle and above, the Aurora Borealis makes its appearance with a spectacle of lights.
No matter the reason, we all want to photo shoot the lights. But how can you do that with your iPhone?
First you need to find the Northern Lights and a good place from where to take the shots - we’ll explain more about this at the end of this article. Secondly you need to learn how to set up your iPhone for the aurora, and get yourself the most necessary accessory.
iPhone Settings for Shooting The Northern Lights - Aurora Borealis
Don’t freak out. It sounds complicated, but it is actually very simple. If you don’t like making settings, then read only Night Mode. That is the most important and necessary setting to shoot the Northern Lights. Without it you will not be able to shoot the Aurora Borealis.
Night Mode
In low-light conditions Night Mode will automatically turn on. The Night Mode icon will appear in the top left corner of your phone. This feature keeps the camera senzor open for a longer amount of time in order to get more light in, and therefore capture more detail in the image. In photography, this feature is known as long exposure. The exposure time you use is the same as how long it takes for your phone to take a photo.
By default, depending on how dark the environment is, the exposure in iPhone’s Night Mode is somewhere between 1 and 3 seconds. For the Northern Lights we need more than this. We need to change the exposure time to the maximum possible:
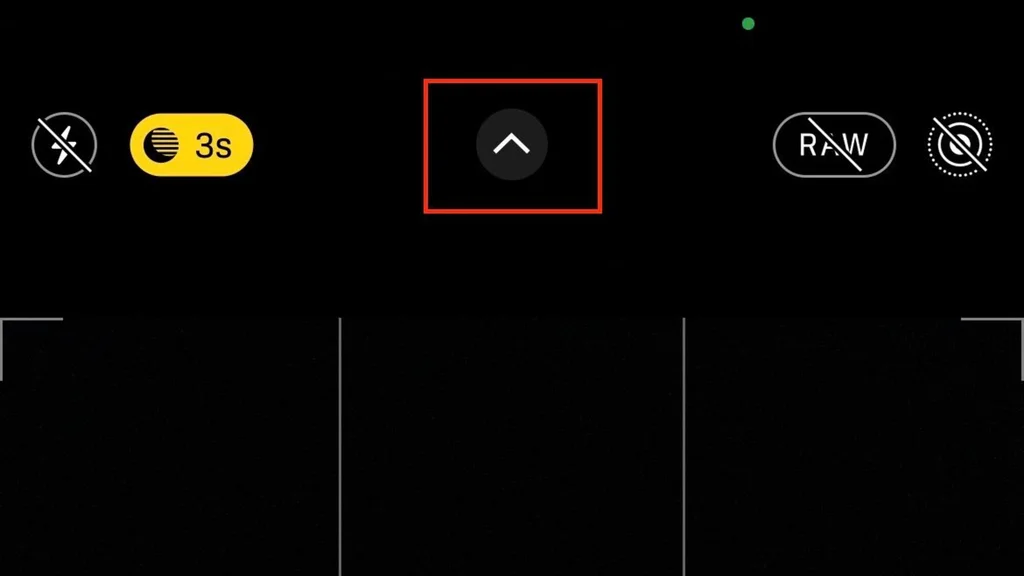
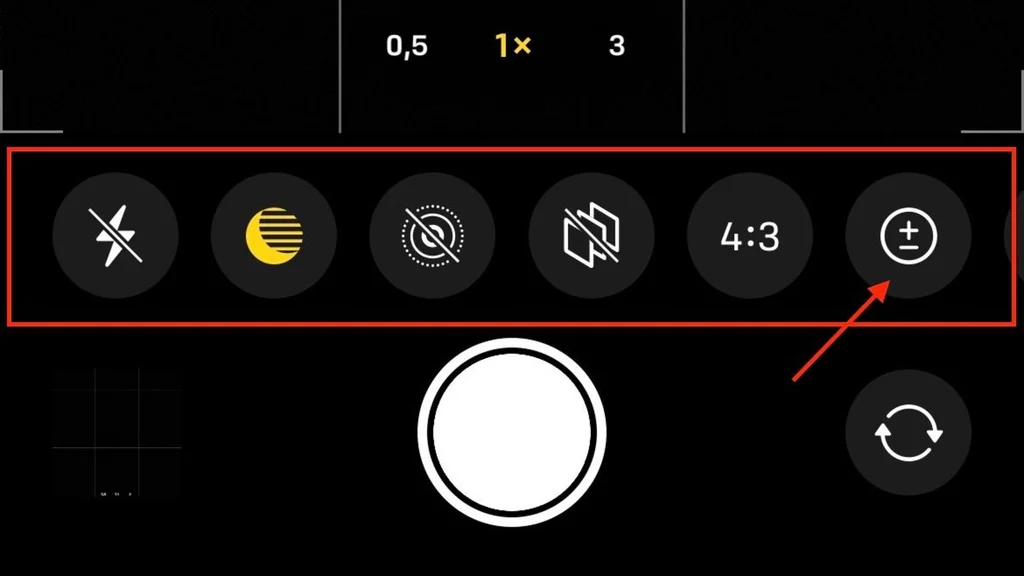
- There’s a hidden settings menu in the iPhone’s camera app. Open this menu using the top arrow.
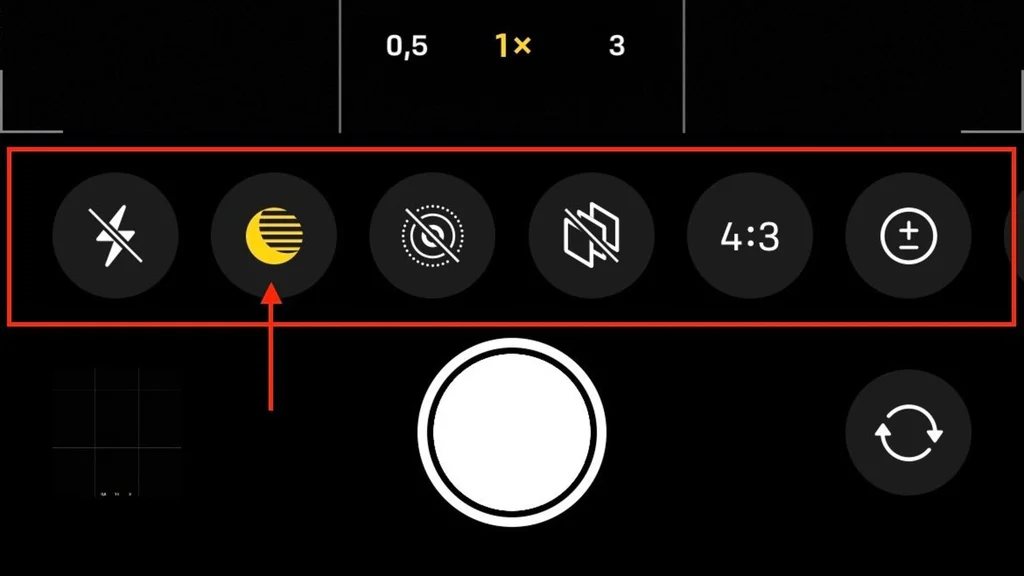
- Look for the Night mode icon and tap on it.
- A slider will appear that allows you to adjust the exposure time.
- Slide it all the way to the right at Max.
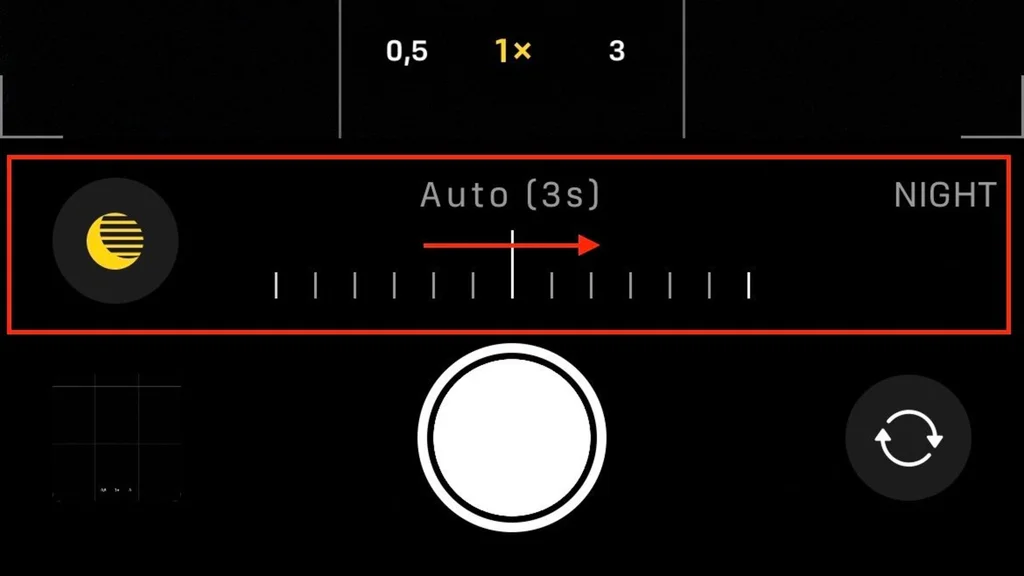
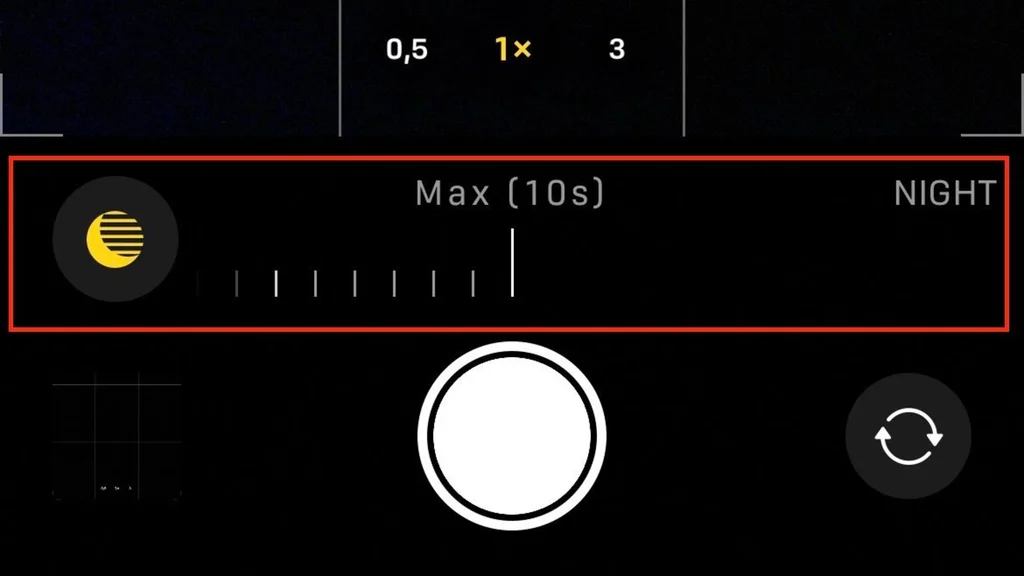
Now this Max value will represent 10 seconds if the iPhone detects movement, such as a shaky hand. If you are using a tripod, then the Max value is 30 seconds. This is the value that we need for the Aurora Borealis or Northern Lights. You will still be able to capture something at 10 seconds as well, but the quality of the image will be quite bad compared to the 30 seconds one.
For best quality photos with the Northern Lights aim for 30 seconds Night Mode. When luck is on your side and the Aurora is very bright, the Night Mode Max value will drop under 30 seconds, usually 27 or 22 seconds.
Even when using a tripod you should choose the right place to put it down. If you place the tripod with the phone on the hood of a car with the engine on it might detect vibrations and use just 10 seconds. If you have a windy night, then it might be impossible to see that 30 seconds exposure that you want.
Exposure Adjustment
Yet another setting? Don’t worry, you might not need to use this one. Sometimes however, the light around you might be very bright, like in the winter when everything is covered with snow. Since snow reflects a lot of light, and Night Mode keeps the camera senzor open to let more light it, it is possible that your photos will be too bright. In this condition you might want to try and change the Exposure Adjustment.
I know it is a bit confusing because of the name: Night Mode means long exposure (the camera sensore is exposed to the light for a longer period of time to capture details in the dark) and this is Exposure Adjustment (to prevent some parts of the photo to be overexposed and lose details).
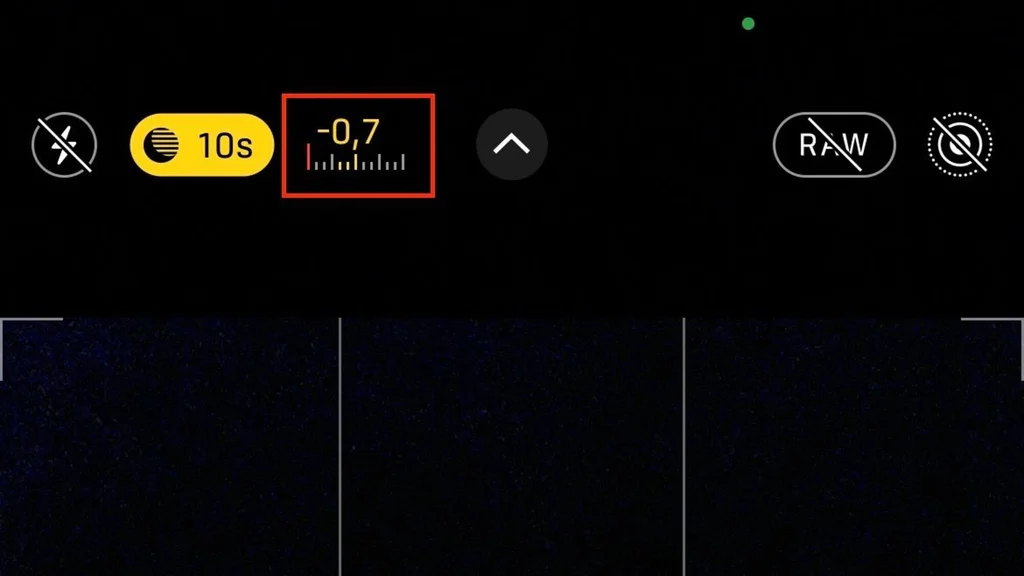
For Exposure Adjustment you need to open the same hidden menu using the top arrow. In this menu you will see an icon with a + and - inside a circle. Click on it and lower the exposure to a negative value. The current Exposure Adjustment value will be visible at the top of the screen, right next to Night mode. If your iPhone is set to preserve this setting, don’t forget to set it back to 0 when you don’t need it.

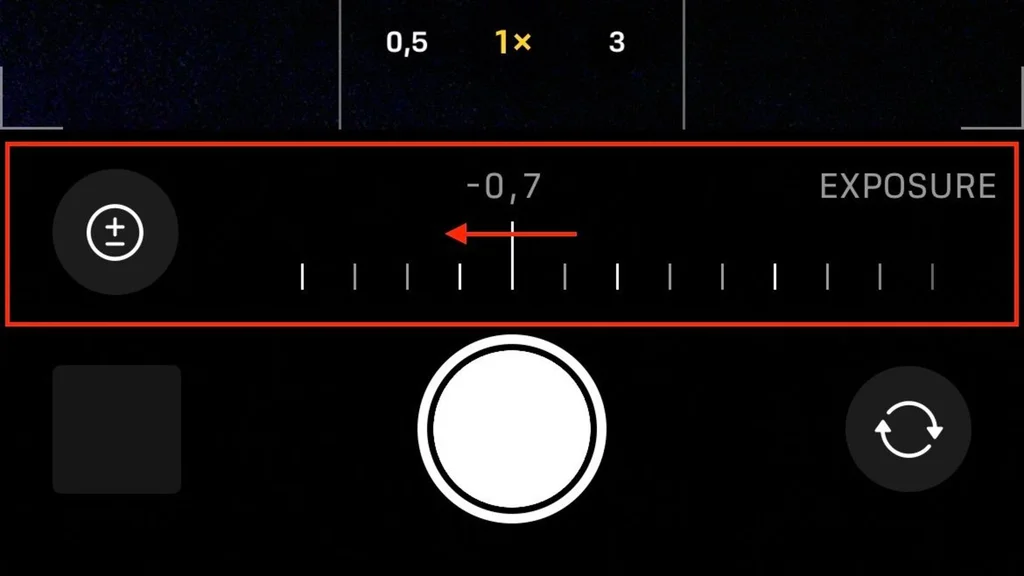
There is no such thing as “the best value”. It depends a lot on your surroundings. You need to try different values and see how your photos look like. For example start by testing a -0.7 value.
How to tell your iPhone to preserve specific settings or not?
Go to Settings > Camera > Preserve Settings, and the two settings that we talked about are Exposure Adjustment and Night Mode.
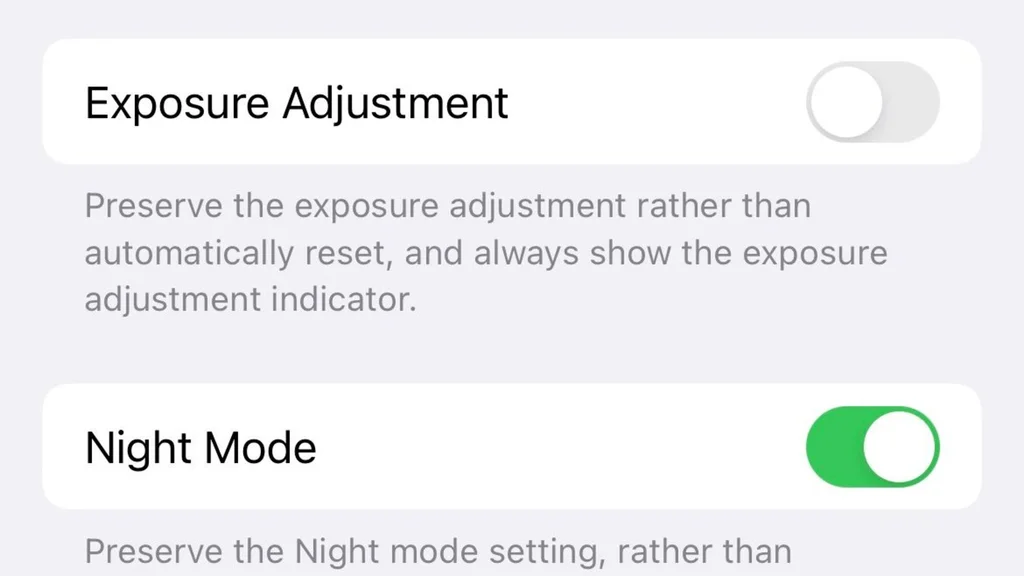
I keep my settings to preserve Night Mode because Night mode automatically turns off when there’s enough lught like for example during the day. I don’t want to have my camera preserve the Exposure Adjusment because it happened to me to take photos during the day with this setting changed and not notice it until it was too late. I also don’t use Exposure Adjustment all the time or at the same level, so I’d rather set it every time I need it.
What iPhone model do I need?
In order to shoot the Northern Lights you would need any iPhone model starting with iPhone 11. That’s because Night mode is only available on iPhone 11 and above models.
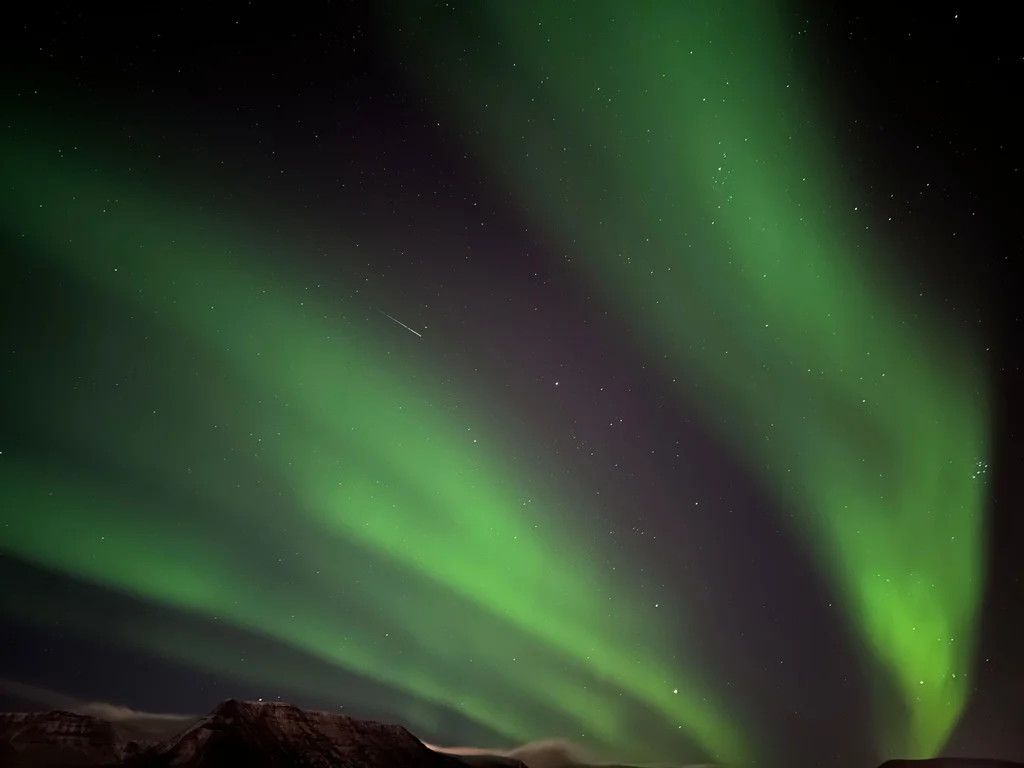
Even if you can shoot the Northern Lights with an iPhone 11, the quality of the photos you take with an iPhone 13 is far greater. I know there are haters out there that say that Apple hasn’t done any improvements to the cameras from one model to the other, but there is nothing more untrue than that. We shot the Aurora with iPhone 11 Pro, 12 Pro and 13 Pro, and you can clearly see the difference between them.
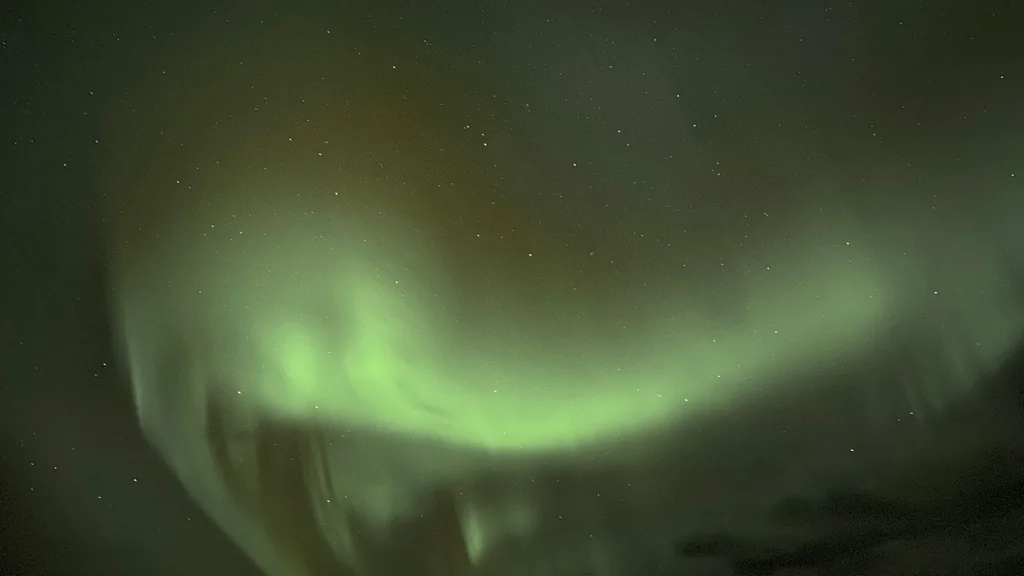

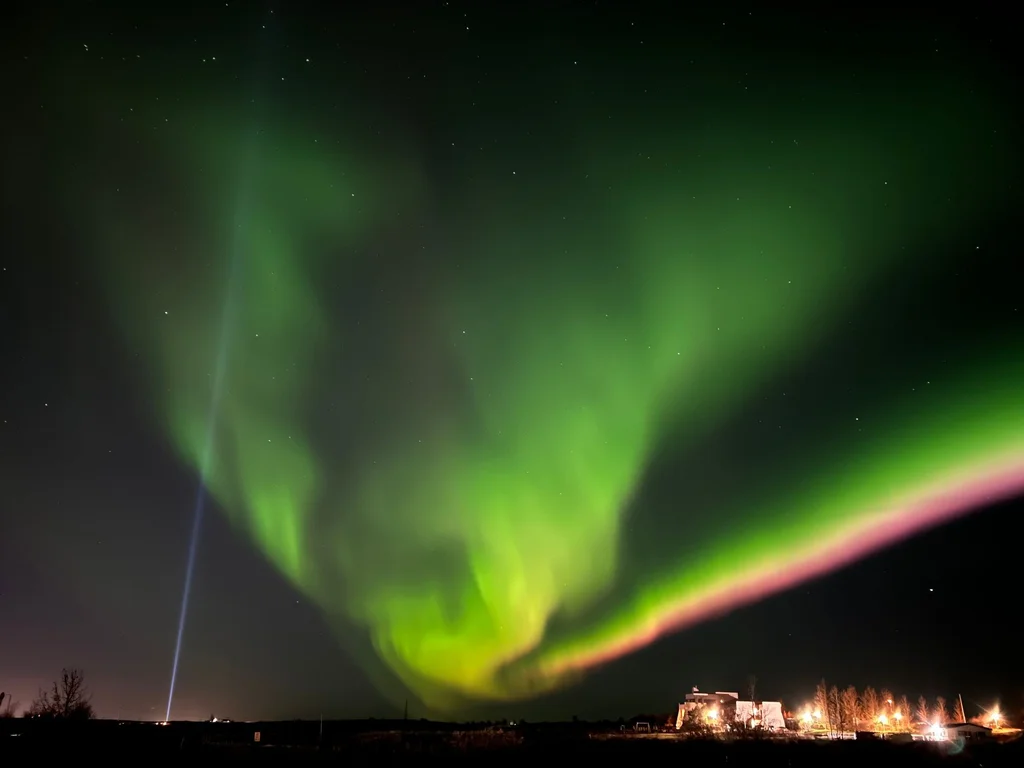
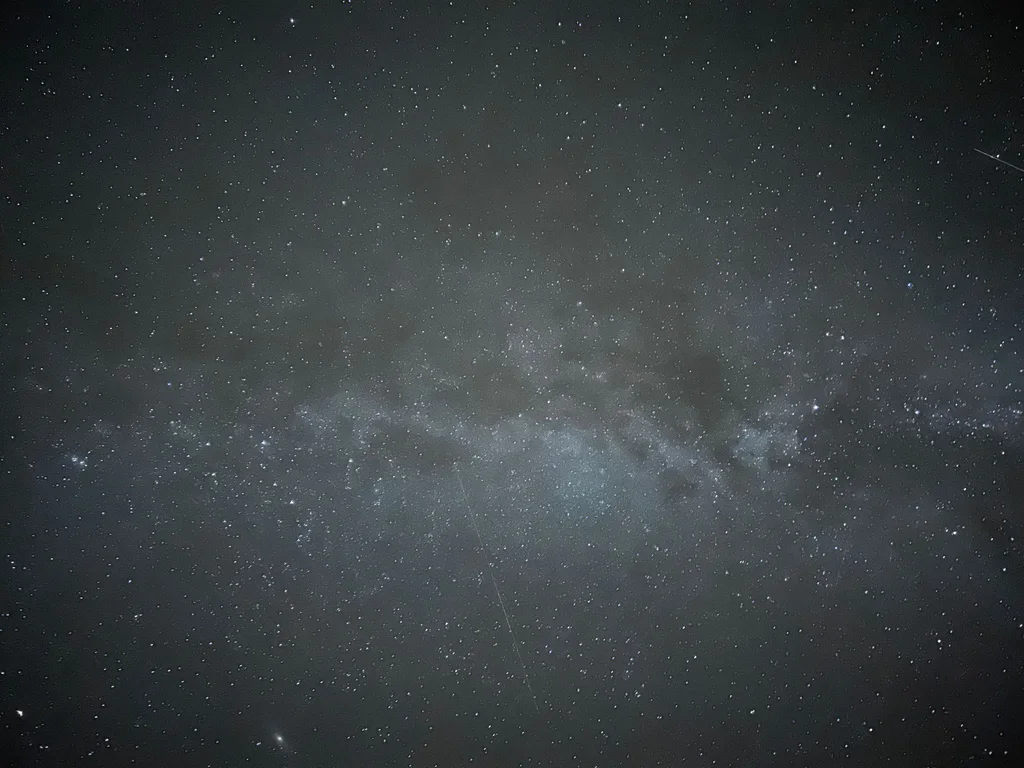
Of course it matters a lot on how intense the Northern Lights, but the sky, the stars, the surrounding elements, and the noise in the images can easily be compared. With iPhone 13Pro we even managed to take astonashing photos of the Milky Way. The photo below has absolutely NO edits. It is the original photo shot by the iPhone 13Pro (not it RAW mode).
With the iPhone 13 Pro I can even film the Northern Lights and get a decent video of it, which I can’t say about the iPhone 12 Pro.
Northern Lights iPhone Accessory
You might have guessed already that the accessory I am talking about is a tripod. Since night time photograhpy requires you to keep the phone still for a few tens of seconds, you’ll need a tripod if you don’t want a shaky photo.
What kind of tripod you might ask. Well, sky is the limit. There are so many tripods on the market that no one can ever try out all of them. You will have to choose one that seems fine for you: in your budget, not low quality material. We don’t really know to recommend you a specific one because ours keep breaking.
We currently use our second Joby and it just broke few nights ago. I assume that the main reason why this happens is because plastic and cold weather are not good friends. Our previous Joby cracked in the same place (at the top ball) in the same cold weather conditions: photo shooting the Northern Lights. I would look for a metal system at my next tripod purchase.
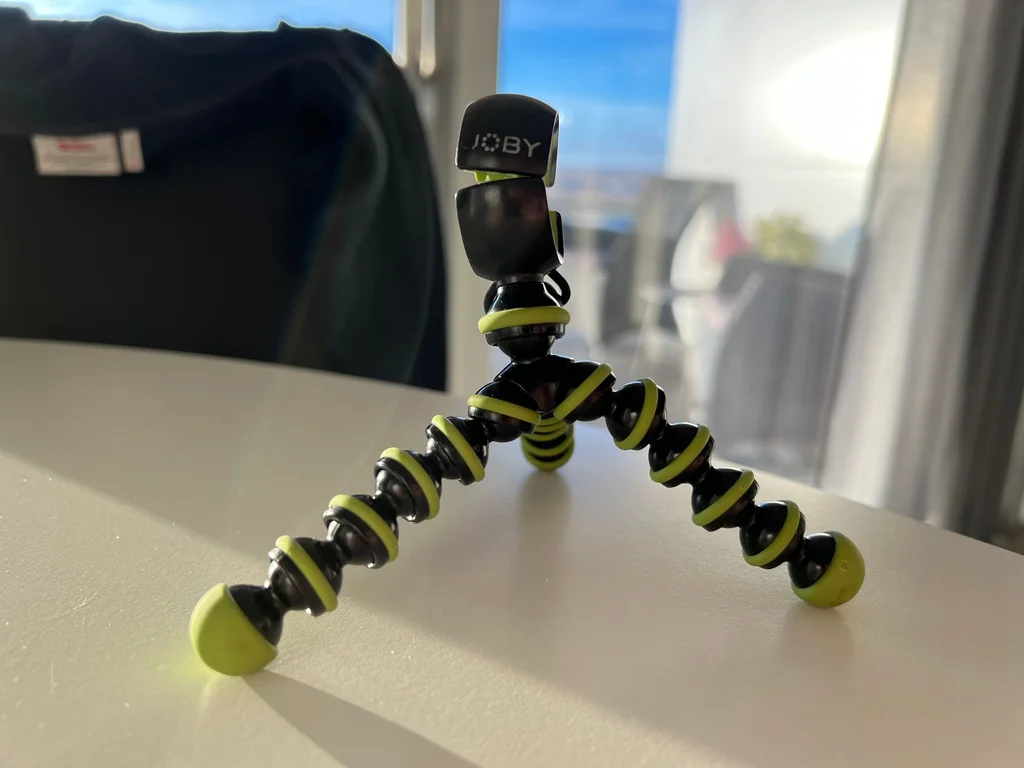
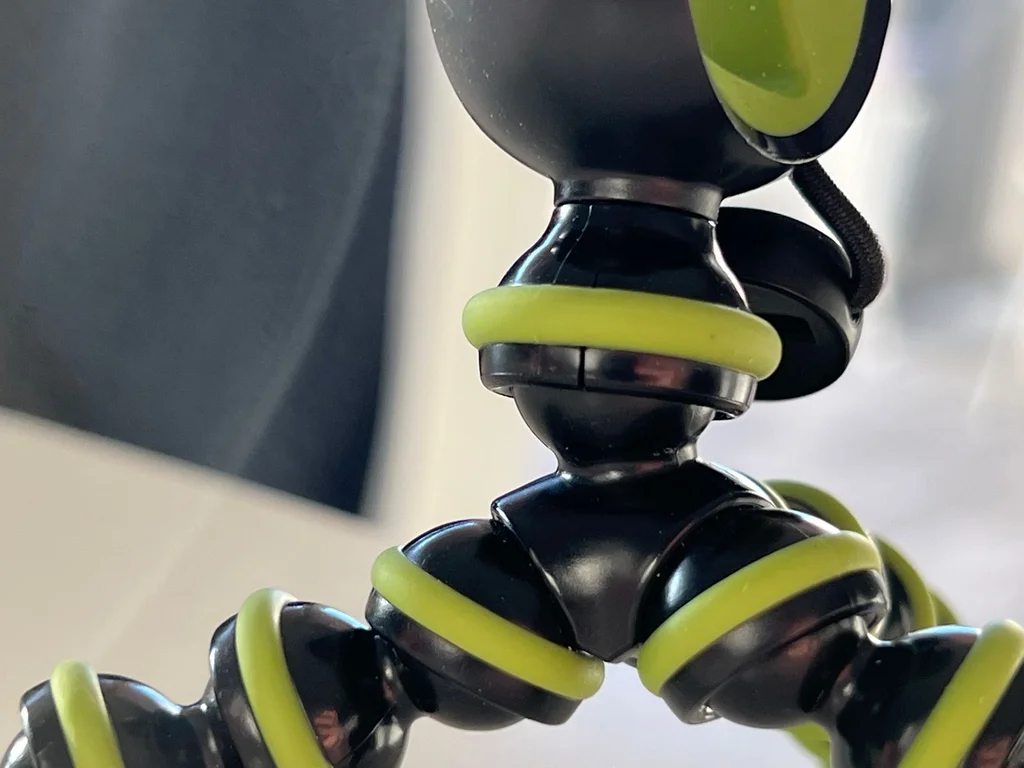
The tripod is still usable, but very hard to position. With the weight of the iPhone on it, it will often tilt from the cracked ball in unwanted directions or it might even move while the phone is taking a photo.
Later Updates: After doing some research, we purchased our third tripod…
…and chose the same Joby tripod. It may not be durable in cold weather but it’s small and lightweight. It is the perfect tripod for travel that you can easily throw in any pocket. This tripod may not be for vloggers or professional photographers, but for us, travelers and experienced yet amateur photographers, it is the best deal in our opinion.
Keep your iPhone battery alive
If you are out in the cold, your iPhone battery will drain faster than you might expect. I remember one night when my battery drained unexpectedly, so make sure to carry a portable charger. Also, keep your phone warm by storing it inside your coat pocket when you’re not using it. This simple trick helped me keep my phone alive for much longer out in the freezing night air.
We have been using a portable charger from Asus, but any power bank will just do that. Previously we used for years a cheap one purchased from a local store in Japan it was working just fine. We are looking to upgrade to a more powerful one, and we are considering the following options:
Now you’re one step closer to get that beautiful shot of the Northern Lights with your iPhone. You just need to learn how to chase the lights.
 Travelfoss
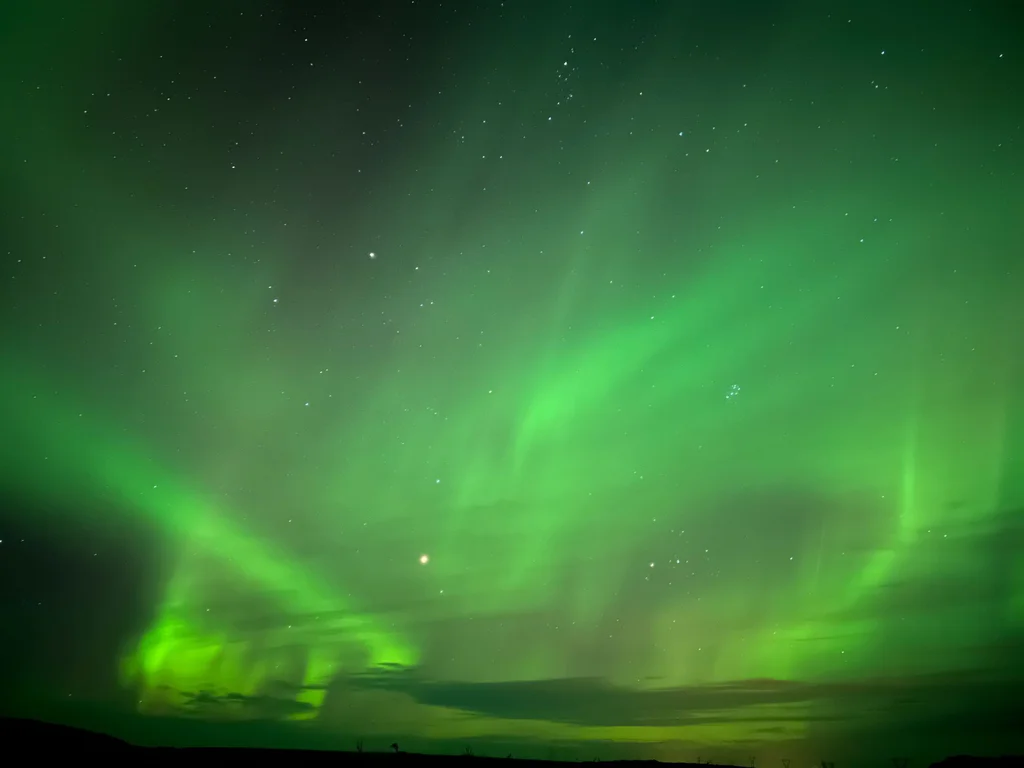
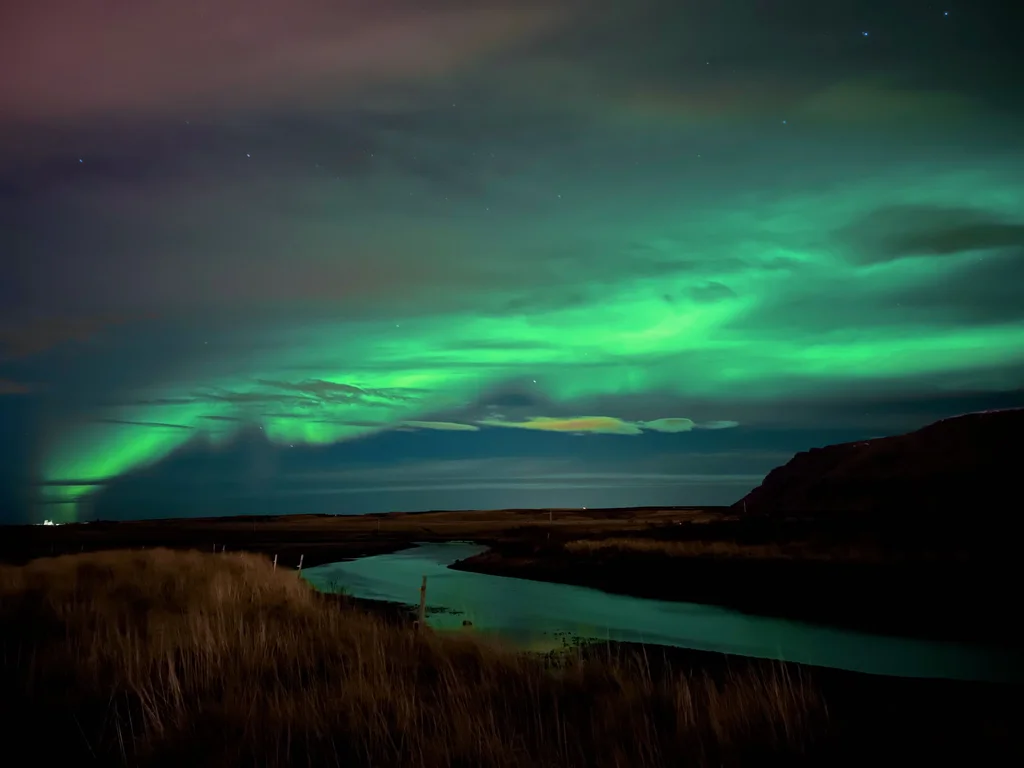
We spent 24 consecutive days this season chasing the Northern Lights. We learned a lot from it, and we also managed to witness some of the most spectacular lights.
Travelfoss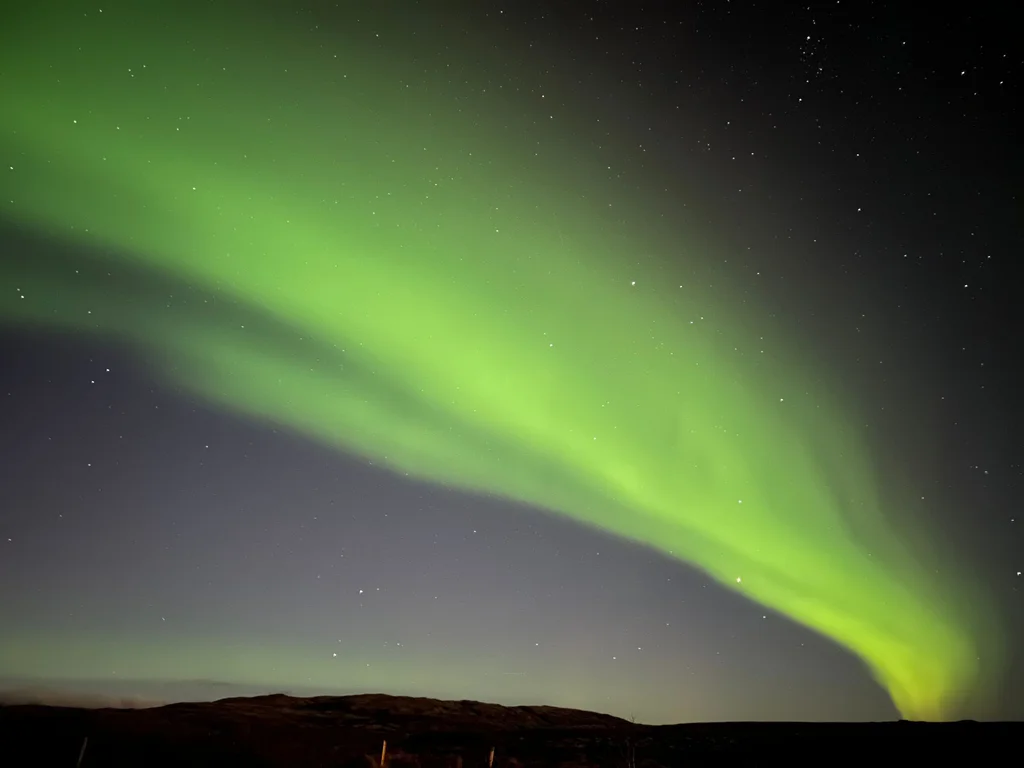
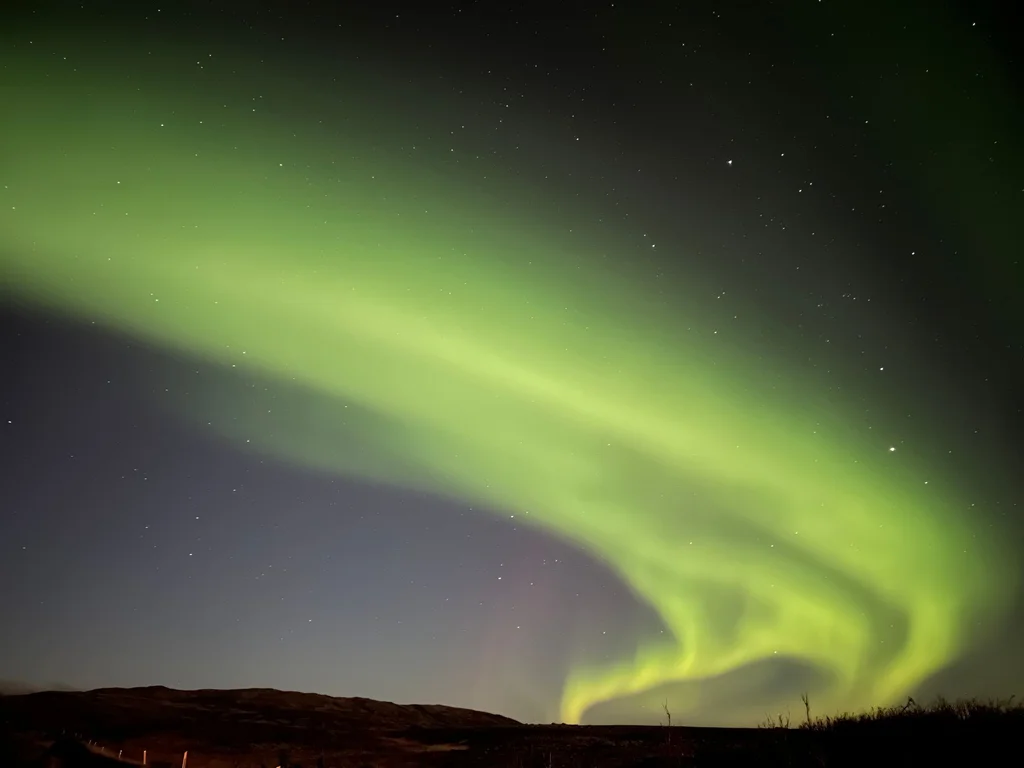
Last, but not least, make sure you stay warm while photo shooting the lights!
Travelfoss
Northern Lights Tour Suggestions
If you are still unsure how to photograph the Northern Lights, we would recommend looking for a professional tour. There are a lot of Norhtern Lights photography tours on Get Your Guide, and you can find one based on your budget and location.
We use Get Your Guide whenever we want to adventure in a new place but don’t know enough about it or don’t have enough time to plan for it. To make sure that you choose the best guided tour, there are a few things that we look for: small groups, professional photographers, and a tour that has a high rating with a good cancellation policy.